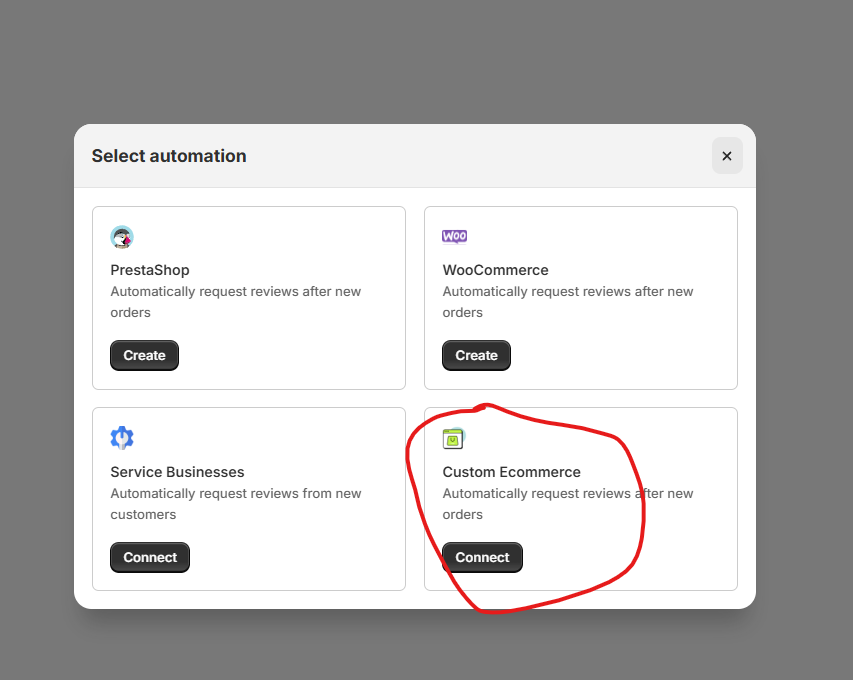
If you’re not using Shopify, WooCommerce, or PrestaShop, WiserReview lets you set up automation via Custom Ecommerce using webhooks or API triggers.
Follow these steps to create a flexible, platform-agnostic automation flow:
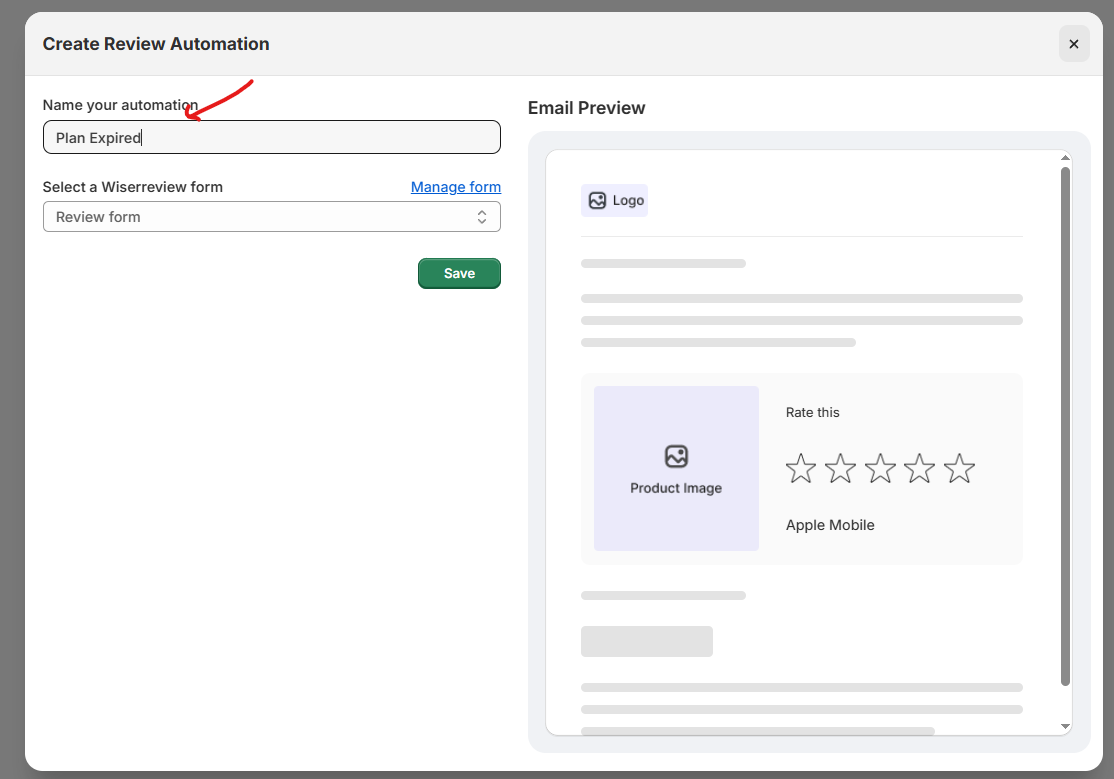
Step 1: Create a New Automation

-
Go to the Automate tab in WiserReview
-
Click Add Automation
-
Select Custom Ecommerce from the list
-
Click Create
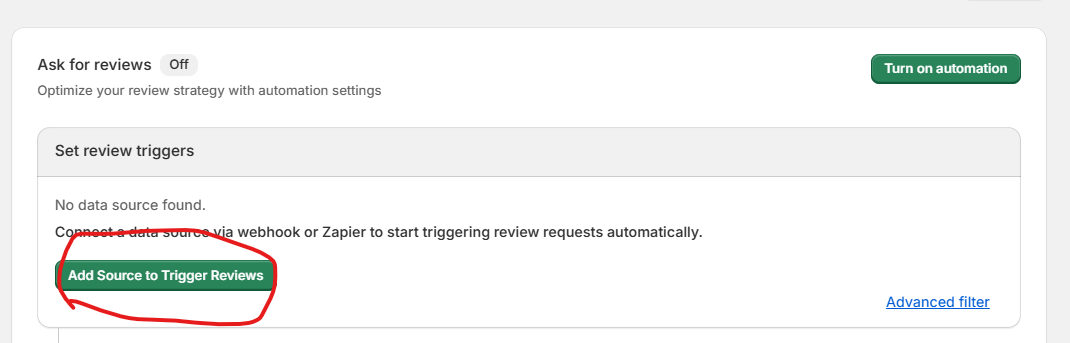
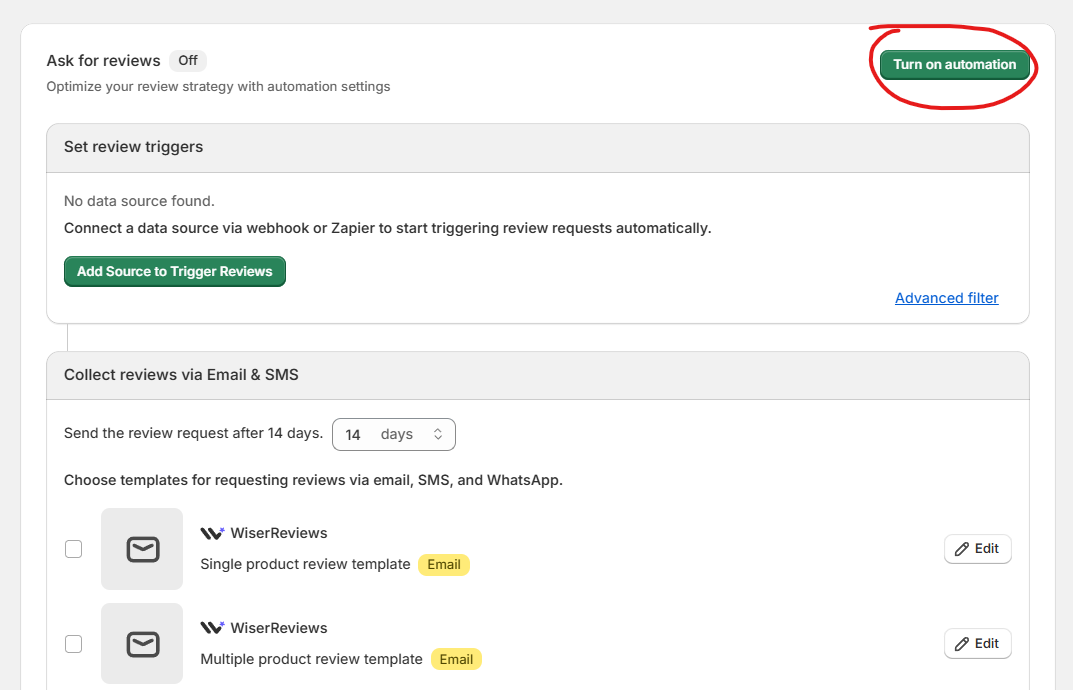
Step 2: Set Review Triggers
-
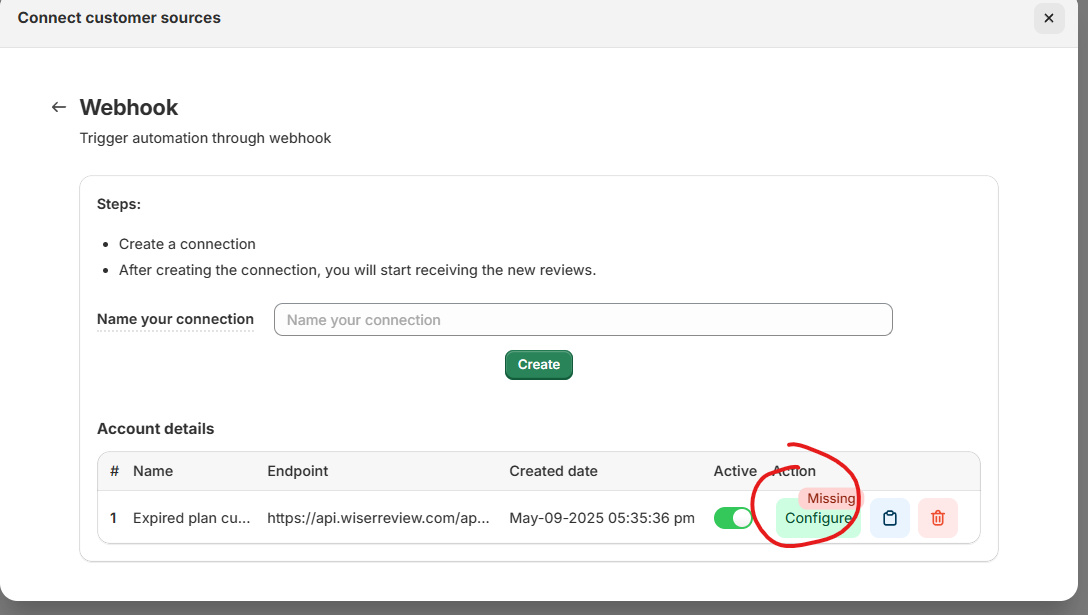
Click Add Source to Trigger Reviews

-
Choose zapier or Webhook under the Integration options.
-
Name your webhook (e.g., “Plan purchase or Course purchase or Product ordered”).
-
Configure and Test Webhook.
-
-
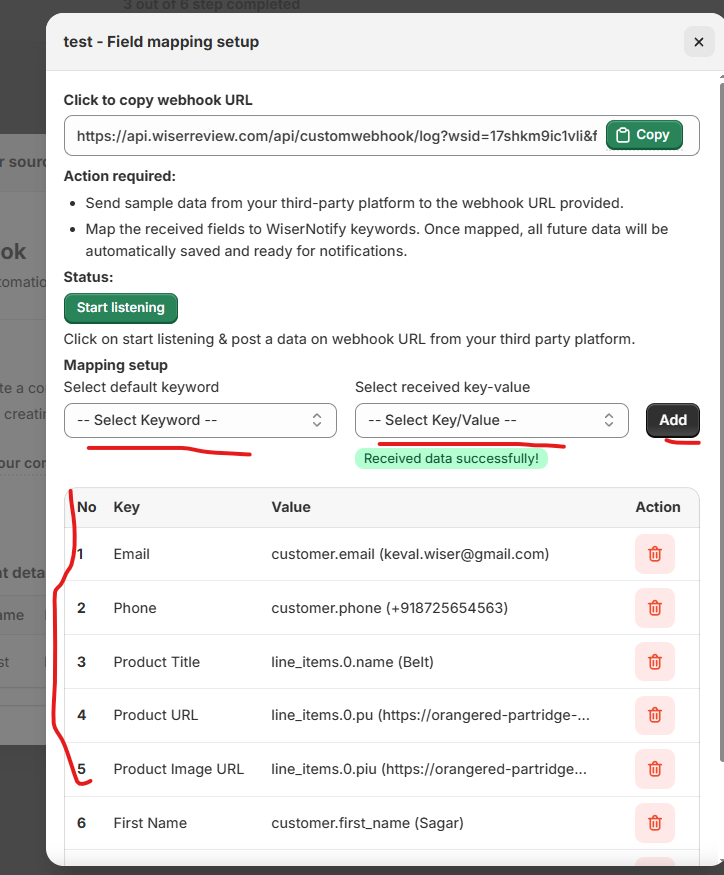
Copy the webhook URL generated
-
From your backend, send a
POSTrequest with customer data when they purchased or ordered
-
Single product review only
Example JSON Payload
{
  "email": "john@example.com",
  "name": "John Doe",
  "productId": "123",
  "productName": "Pro Plan",
  "productImage": "https://example.com/image.jpg",
  "productUrl": "https://example.com/products/pro-plan"
}
Field mapping
OR
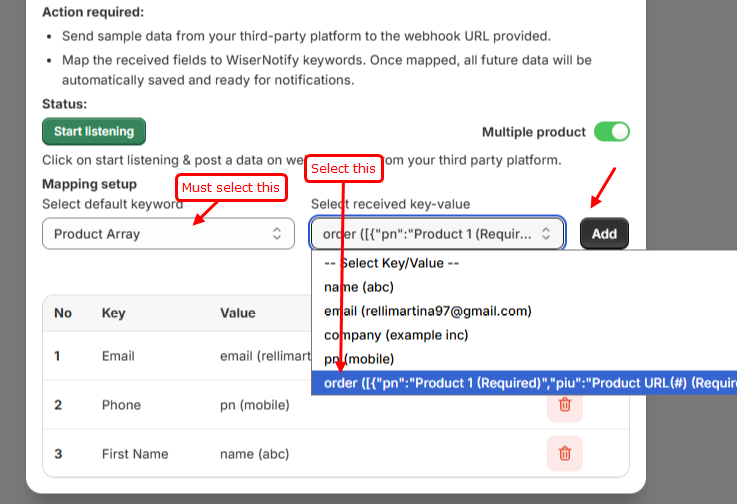
Multi-product review request only
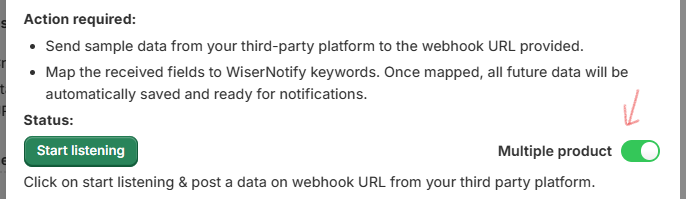
Make sure you have the pn, pid, pu, piu, sku, and vrntid attributes exactly as they appear below, within the order array.
Example JSON Payload:
{
"name": "abc",
"email": "rellimartina97@gmail.com",
"company": "example inc",
"pn": "mobile",
"order": [
{
"pn": "Product 1 (Required)",
"pid": "PID-11 (Required)",
"pu": "Product URL (Required)",
"piu": "Product image URL(#)",
"sku": "SKU-11",
"vrntid": "VRNT-11"
},
{
"pn": "Product 2 (Required)",
"pid": "PID-22 (Required)",
"pu": "Product URL (Required)",
"piu": "Product image URL(#)",
"sku": "SKU-22",
"vrntid": "VRNT-22"
},
{
"pn": "Product 3 (Required)",
"pid": "PID-33 (Required)",
"pu":"Product URL (Required)",
"piu": "Product image URL(#)",
"sku":"SKU-33",
"vrntid" :"VRNT-33"
}
]
}
Multiple product array field mapping:
-
Once data is sent, do field mapping (match fields like email, name, productId)
-
Close the webhook setup screen
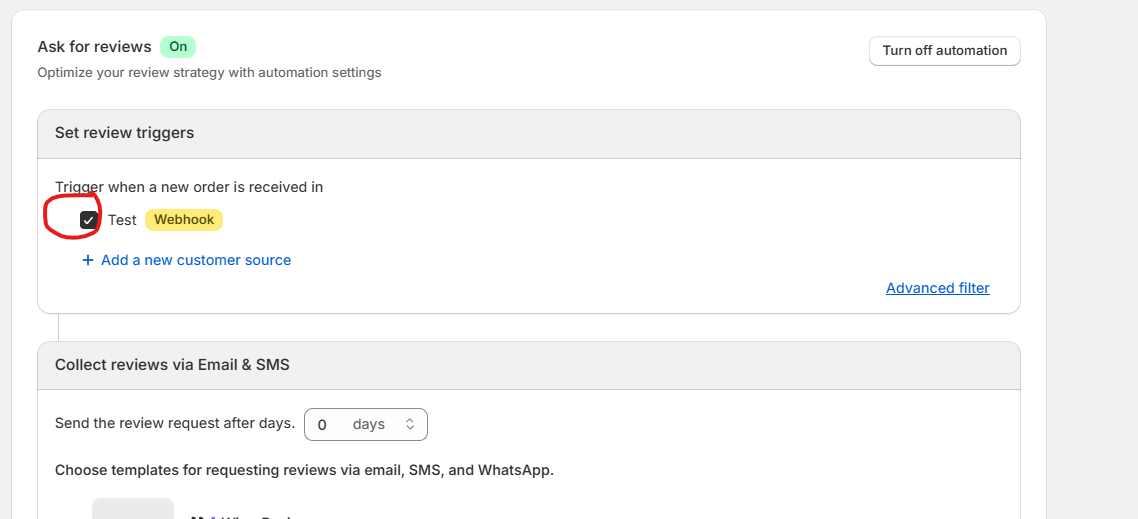
- Select this webhook as your Data Source in the trigger section
Under “Advanced filter”, choose:
- All customers and products, or
- Specific customers or products
If you choose specific, set conditions:
- Select a type (e.g., Product name)
- Choose a condition (e.g., Does not contain)
- Enter the value (e.g., addon)
- Click Add
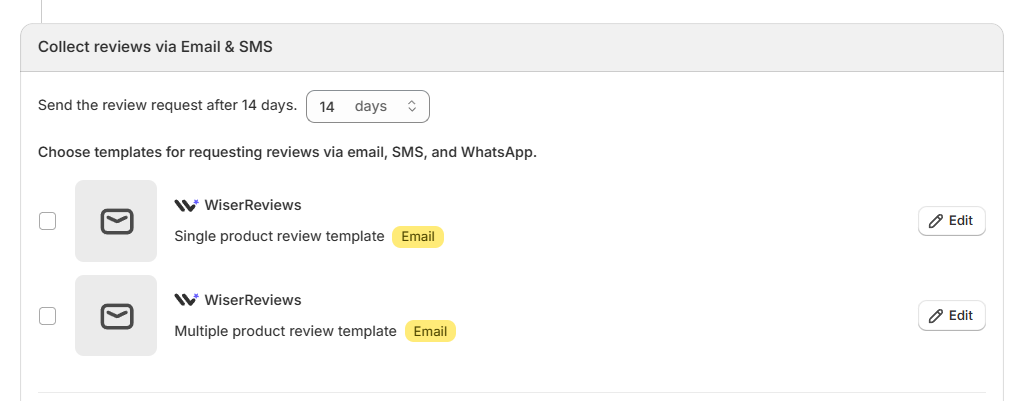
Step 3: Collect Reviews via Email or SMS
-
Set the delay (e.g.,
14 daysafter webhook is triggered)Use
0 daysif you want the email sent instantly when data is received -
Select one of the available Email templates:
-
-
Single product review
-
Multiple product review
-
-
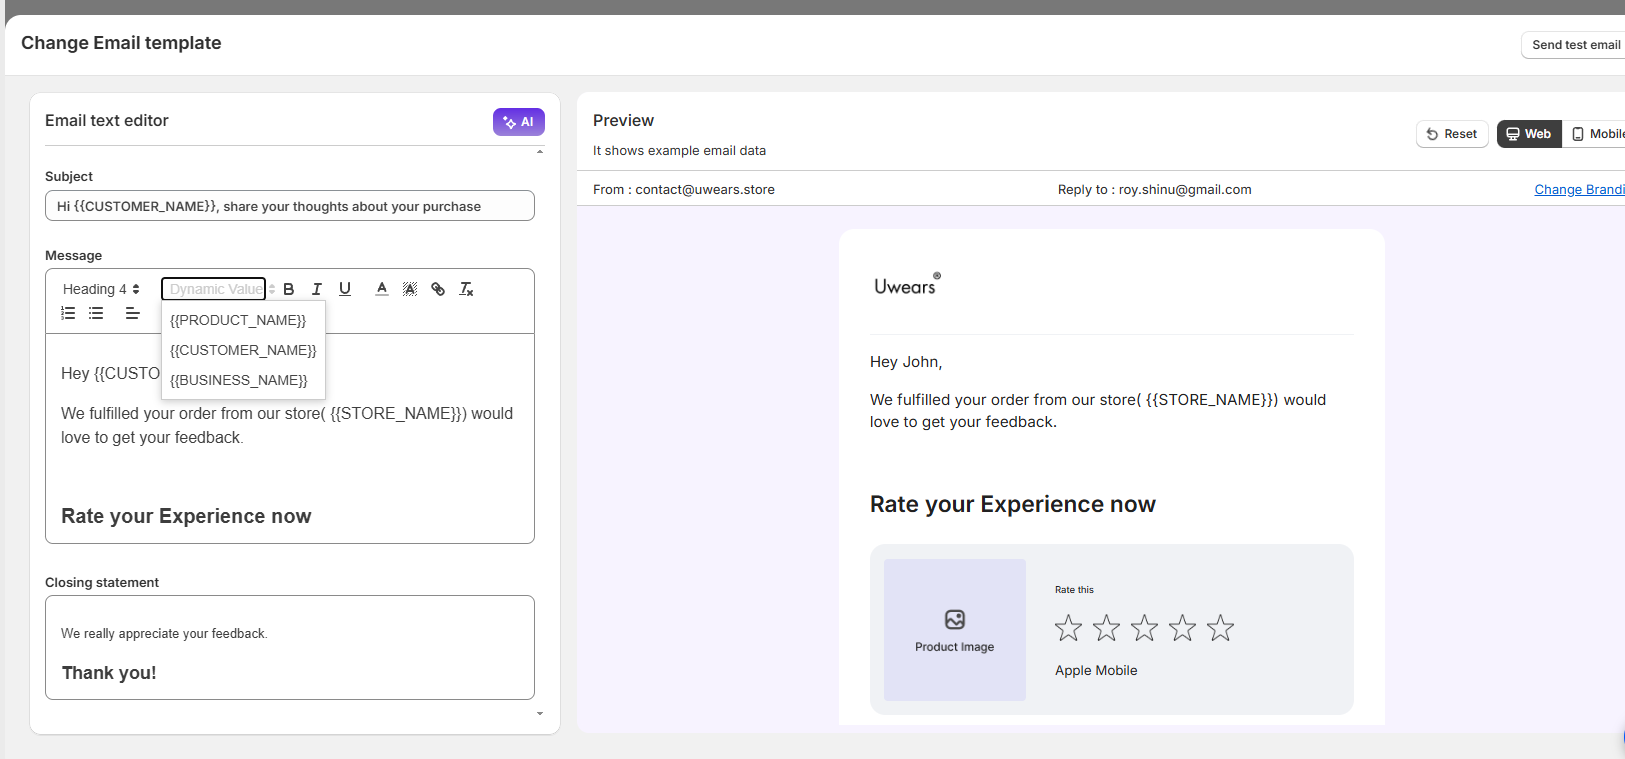
Click Edit to:
-
Update content
-
Add branding
-
Use dynamic tags like
{customer_name},{product_name},{review_link}
-
-
Click Send Test Email inside the editor to preview the message
-
Enable Additional Channels (Optional)
- Connect your Whatsapp & SMS channel or tool to send the review request
-
Add a message template for WhatsApp or SMS in your marketing channel
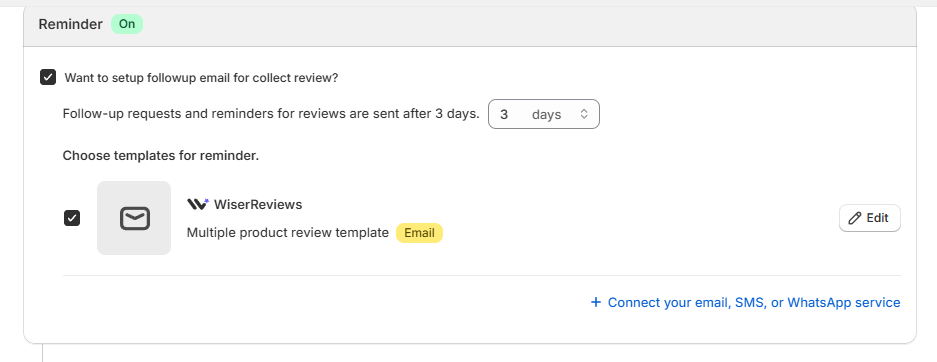
Step 4: Enable Reminder Emails (Optional)
-
Turn on the Reminder toggle
-
Set how many days later the reminder should be sent (e.g., 3 days after the first email)
-
Choose your reminder template and click Edit to customize
-
Test the reminder email using the Send Test Email button
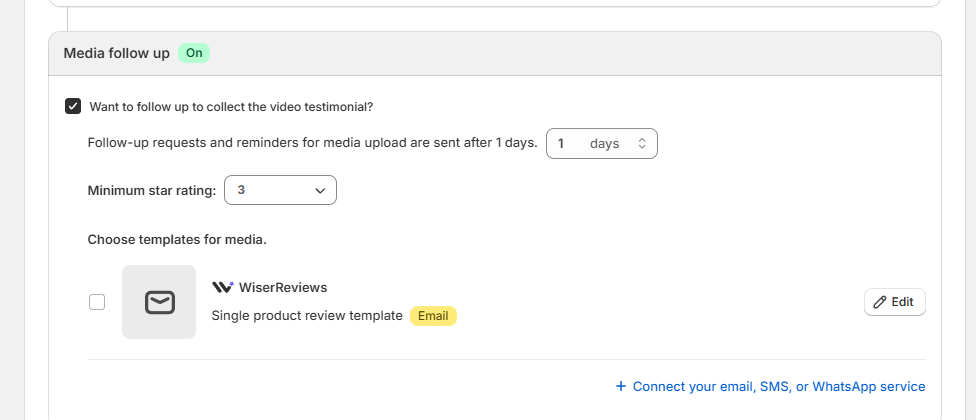
Step 5: Enable Media Follow-Up (Optional)
-
Turn on the Media follow up toggle.
-
Set delay (e.g., 1 day after review submission).
-
Choose a minimum star rating (e.g., 3 stars) — only customers who rated positively will receive the request.
-
Select or edit your email template for collecting media like video testimonials.
-
Send a test email before saving.
Step 6: Final Testing and Activation
-
Make sure you’ve tested:
-
First review request email
-
Reminder email (if used)
-
Media follow-up email (if used)
-
-
After testing, click Save
-
Ensure the automation is set to ON