The Verify Badge helps your visitors see which reviews are authentic and connected to real purchases. When enabled, a small verified checkmark appears next to the reviewer’s name. You can also choose to show extra text when users hover over the badge.
This feature is available across all review widgets, cards, and popups in WiserReview.
How to Enable or Disable the Verify Badge
Step 1: Open Widget Settings

-
Log in to your WiserReview Dashboard.
-
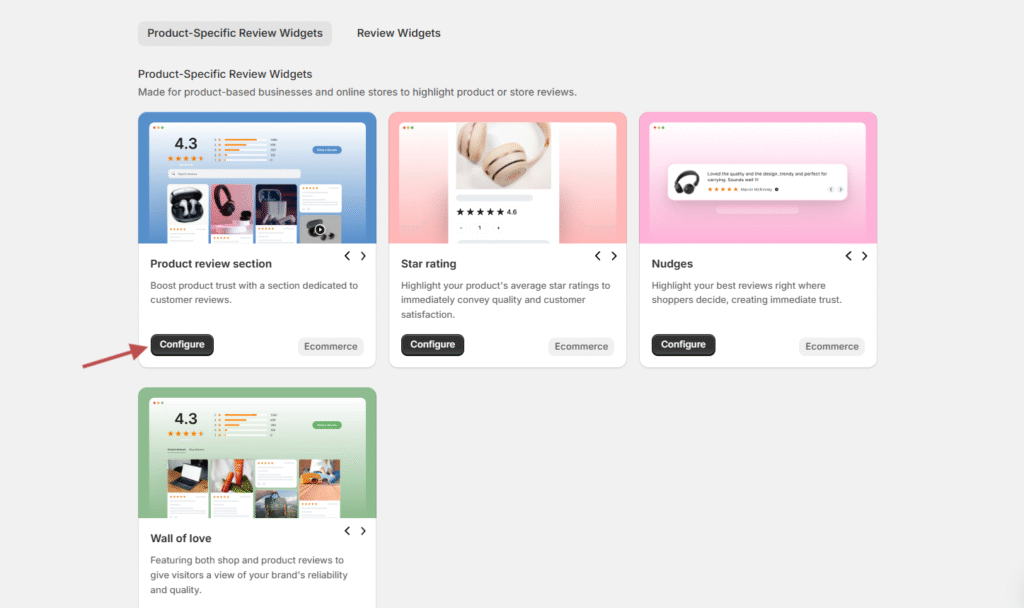
Go to the widget, card, or popup where you want to show reviews.
-
Click on Configure to open the settings panel.
Step 2: Locate the Verify Badge Option

-
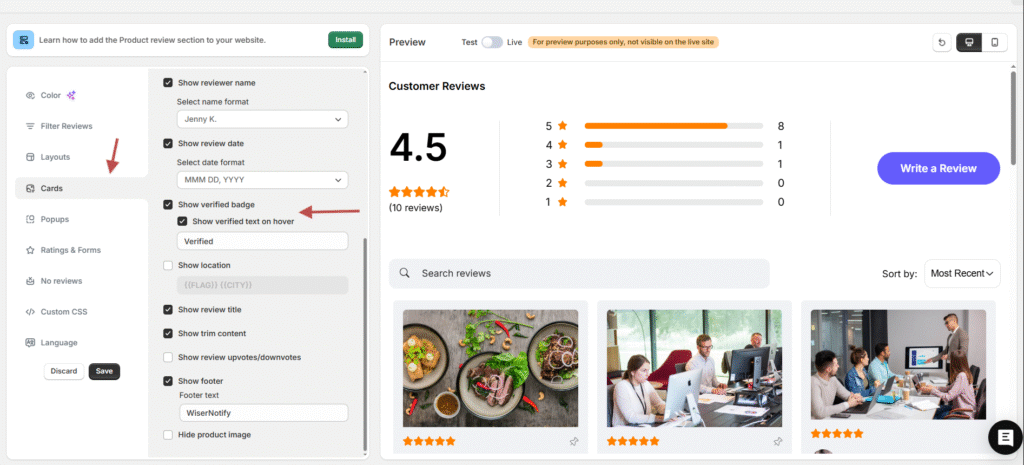
In the settings panel, look for the section called Cards or Layout (depending on the widget type).
-
Find the option Show Verified Badge.
-
Check the box to enable it or uncheck the box to disable it.
Step 3: (Optional) Show Verified Text on Hover
-
Below the Show Verified Badge option, you’ll see a setting for Show Verified Text on Hover.
-
If enabled, visitors will see text like “Verified” when they hover over the badge.
-
You can customize this text field to display any message you prefer.
Preview & Save
-
Use the Preview panel on the right side to see how the badge looks on your widget or popup.
-
Once satisfied, click Save to apply changes.
Final Notes
-
The Verify Badge is supported across all review display types (widgets, cards, and popups).
-
It can be turned on or off anytime from the customization panel.
-
Adding hover text is optional but helps explain what the badge means to customers.
Why Use the Verify Badge?
-
Builds trust with new visitors by showing reviews are from real customers.
-
Adds an extra layer of credibility to your review display.
-
Makes your reviews stand out from fake or unverified feedback.
👉 With these steps, you can easily highlight verified reviews on your site, making them more trustworthy and reliable for new customers.