WiserReview makes it easy to collect reviews from past customers by launching a Manual Review Campaign using a CSV file.
This guide walks you through a step-by-step guide to launching a Manual Review Campaign
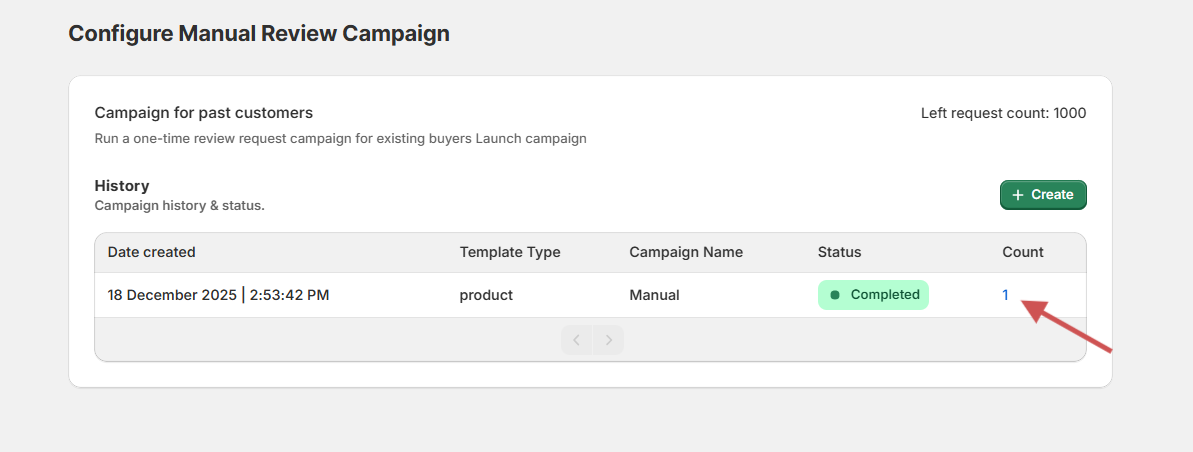
Step 1: Go to the Manual Campaign Section
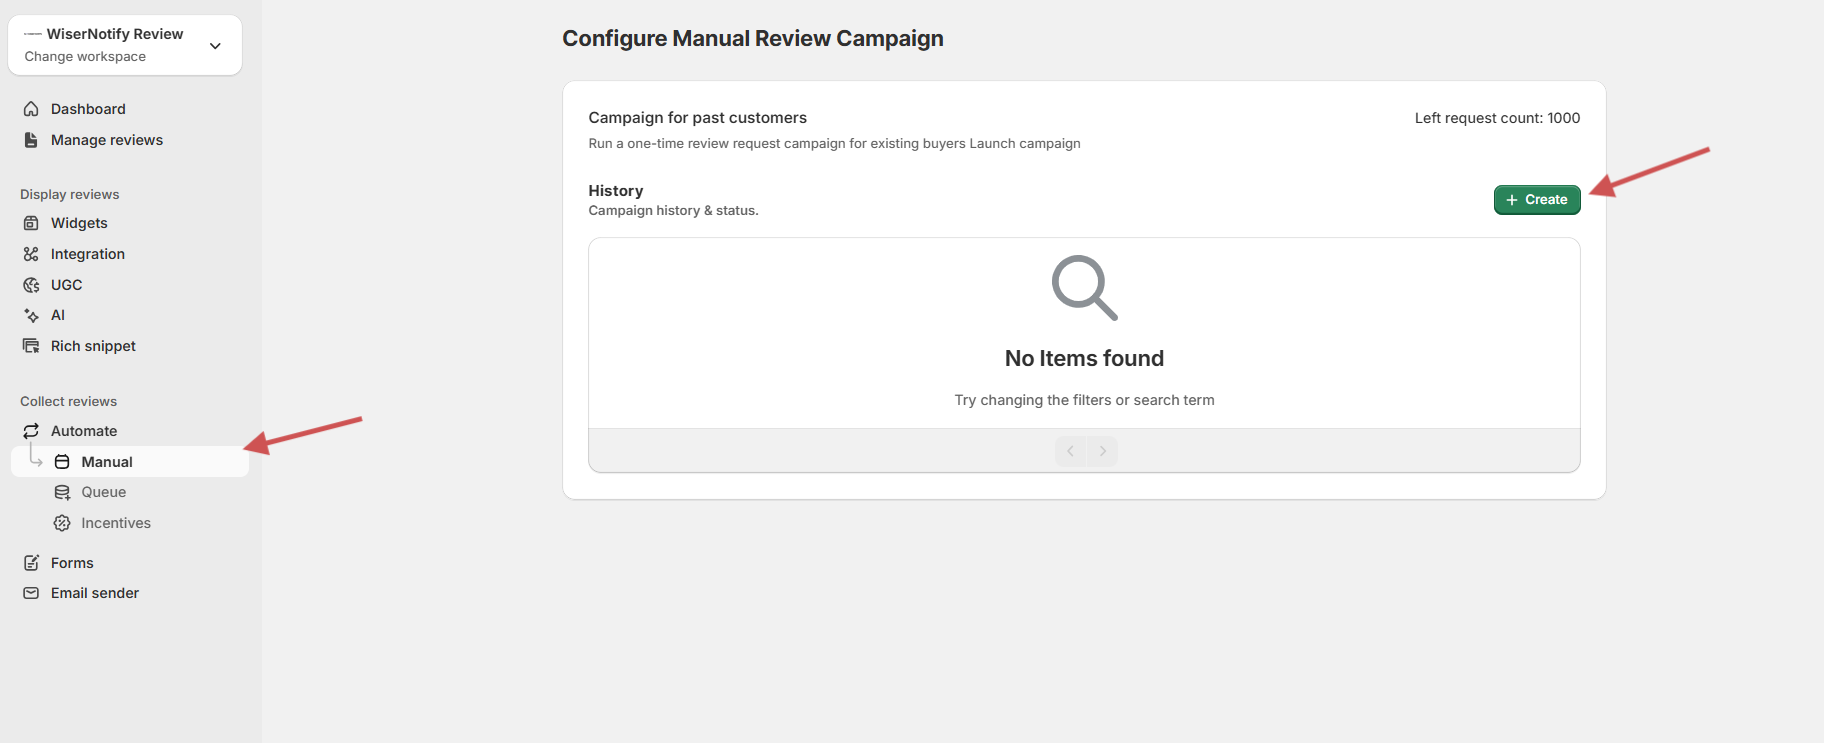
- From the WiserReview dashboard, navigate to: Collect reviews → Manual
- Click the
+ Createbutton.
Step 2: Choose the Right Email Template

You’ll see two template options:
- Product email template – For ecommerce or physical product reviews.
- Service email template – For coaching, consulting, or service-based businesses.
- If you’re an ecommerce brand → Choose Product
- If you’re a service provider → Choose Service
Both templates automatically link to your selected WiserReview form and include dynamic placeholders for customer name, product name, and more.
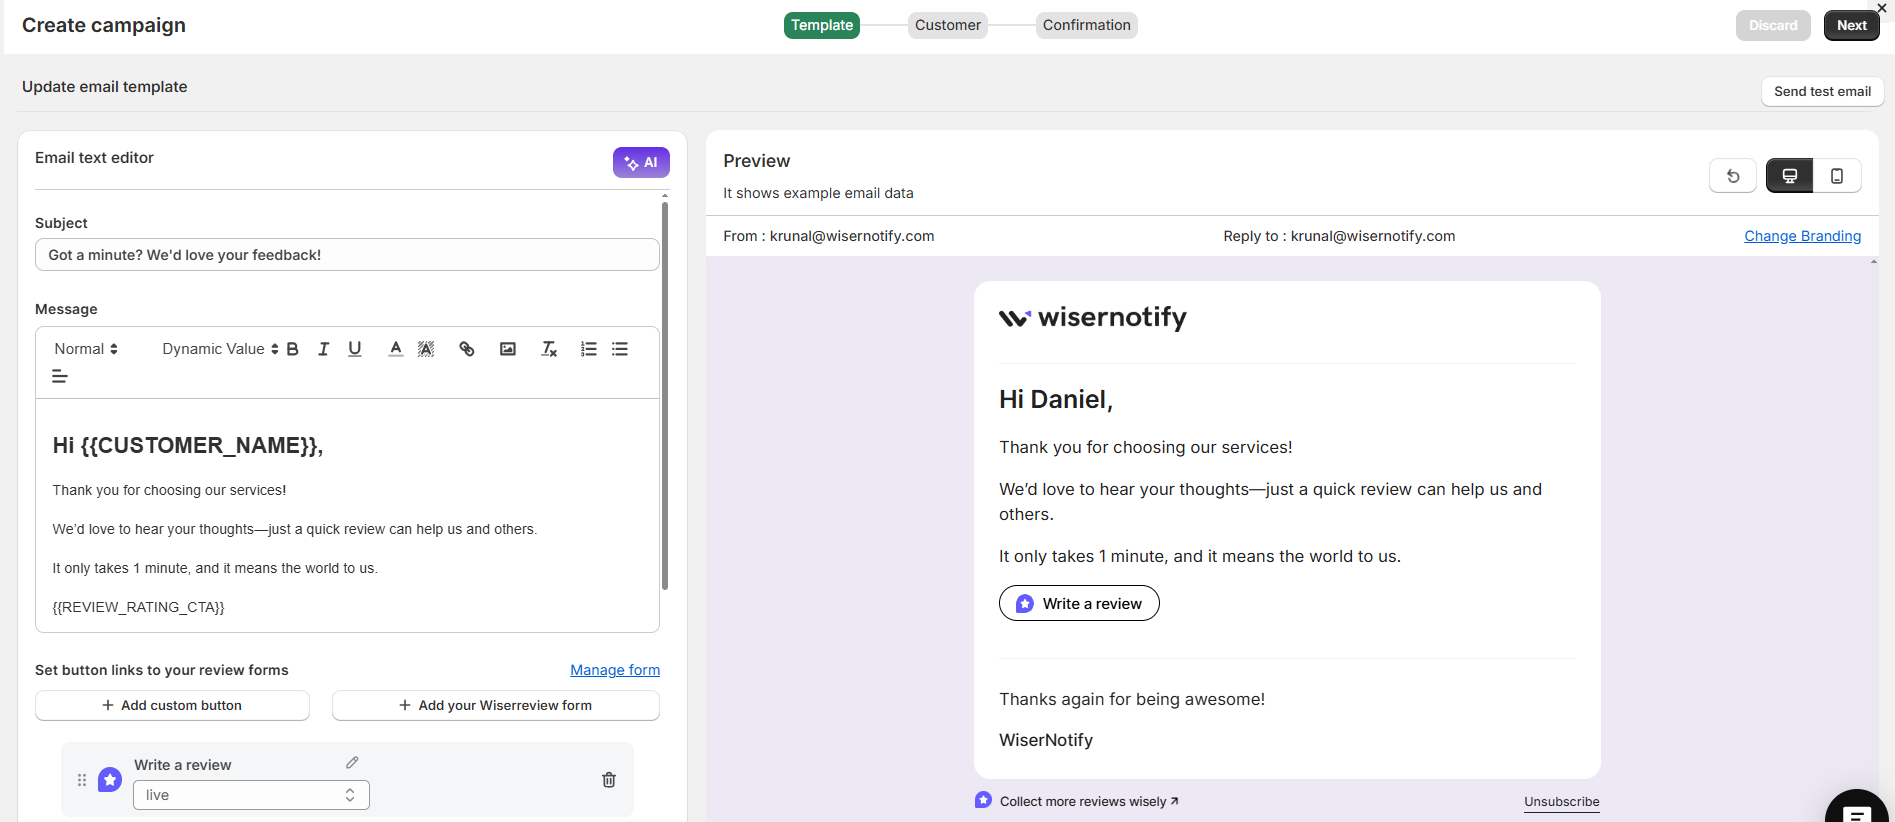
Step 3: Customize Your Email
You’ll now land on the Email Editor:
For Product Review Template:

-
Subject & Body:
-
Personalize the subject (e.g., “Got a minute? We’d love your feedback!”) and body (e.g., “Hi {{CUSTOMER_NAME}}, we’d love to hear your thoughts… {{REVIEW_RATING_CTA}}”).
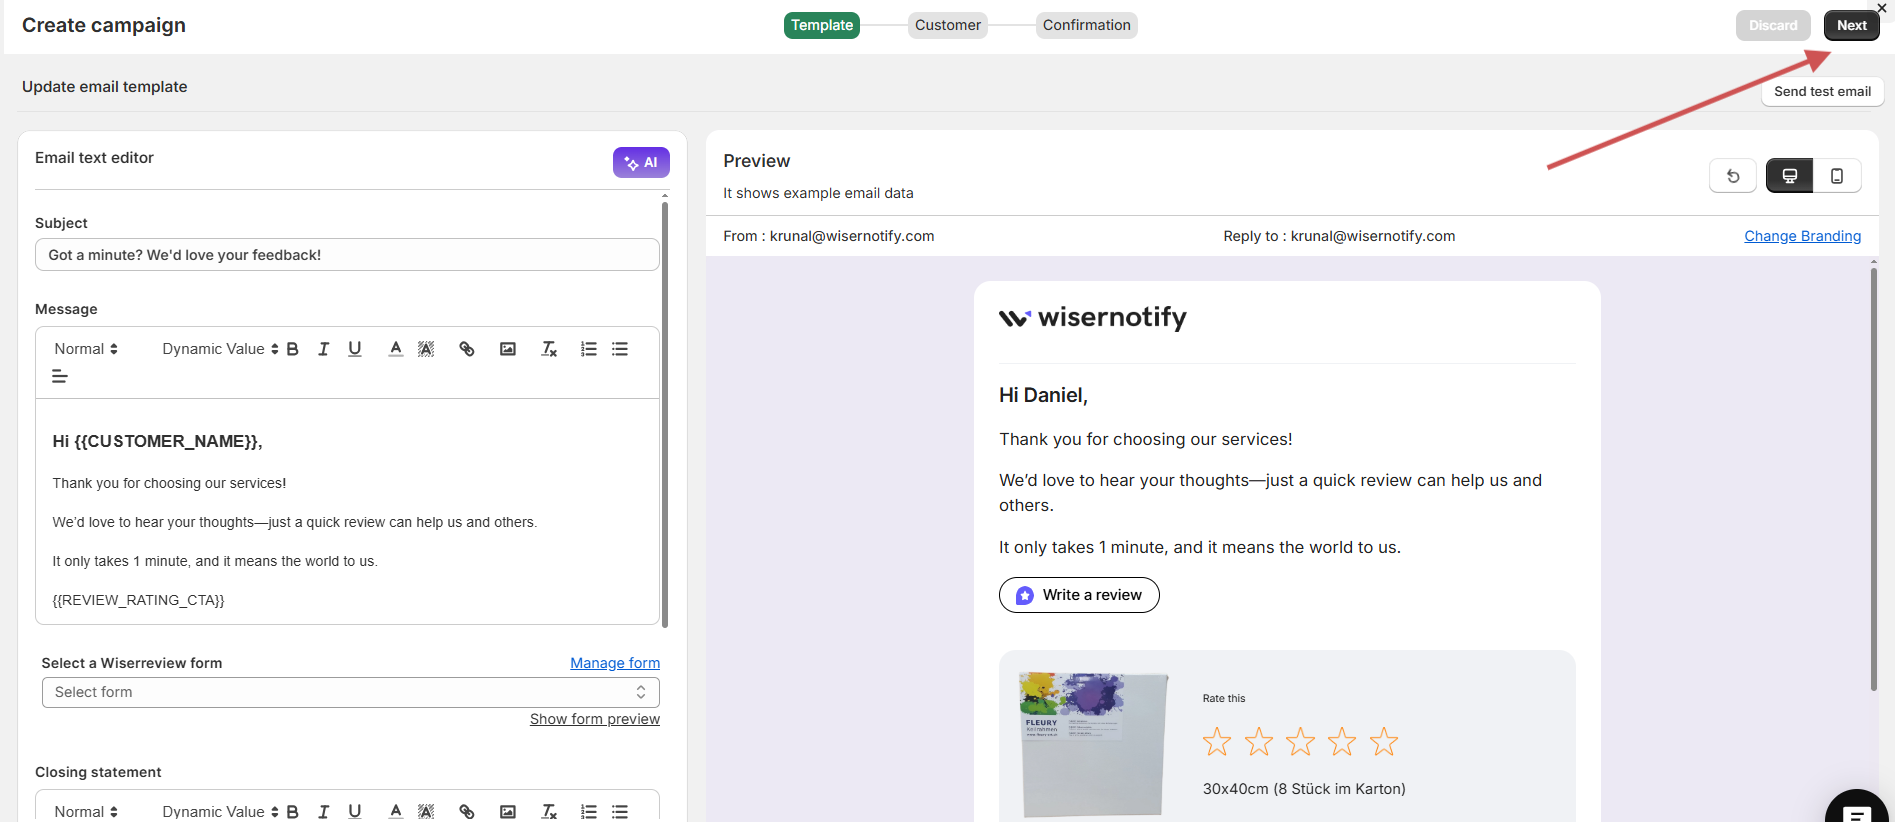
- Select the appropriate WiserReview form using the dropdown.
-
-
Product Details: Add product info (title, image) to make the email more appealing.
For Service Feedback Template:
-
Subject & Body:
-
Personalize the subject (e.g., “We’d love to hear your thoughts on the service!”) and body (e.g., “Hi {{CUSTOMER_NAME}}, thank you for choosing our service… {{REVIEW_RATING_CTA}}”).
-
-
Service Details: Add relevant service details to help customers recall their experience.
Preview and Test Your Email
-
Preview: Check how your email will look by using the preview feature.
-
Test Email: Send a test email to ensure everything looks good before launching.
Then click on the “Next” button.
Note:- Make sure your form is already created in the Forms module and matches the type (product/service) selected earlier.
Step 4: Upload Your Customer CSV File
Now it’s time to add your customer or client list.
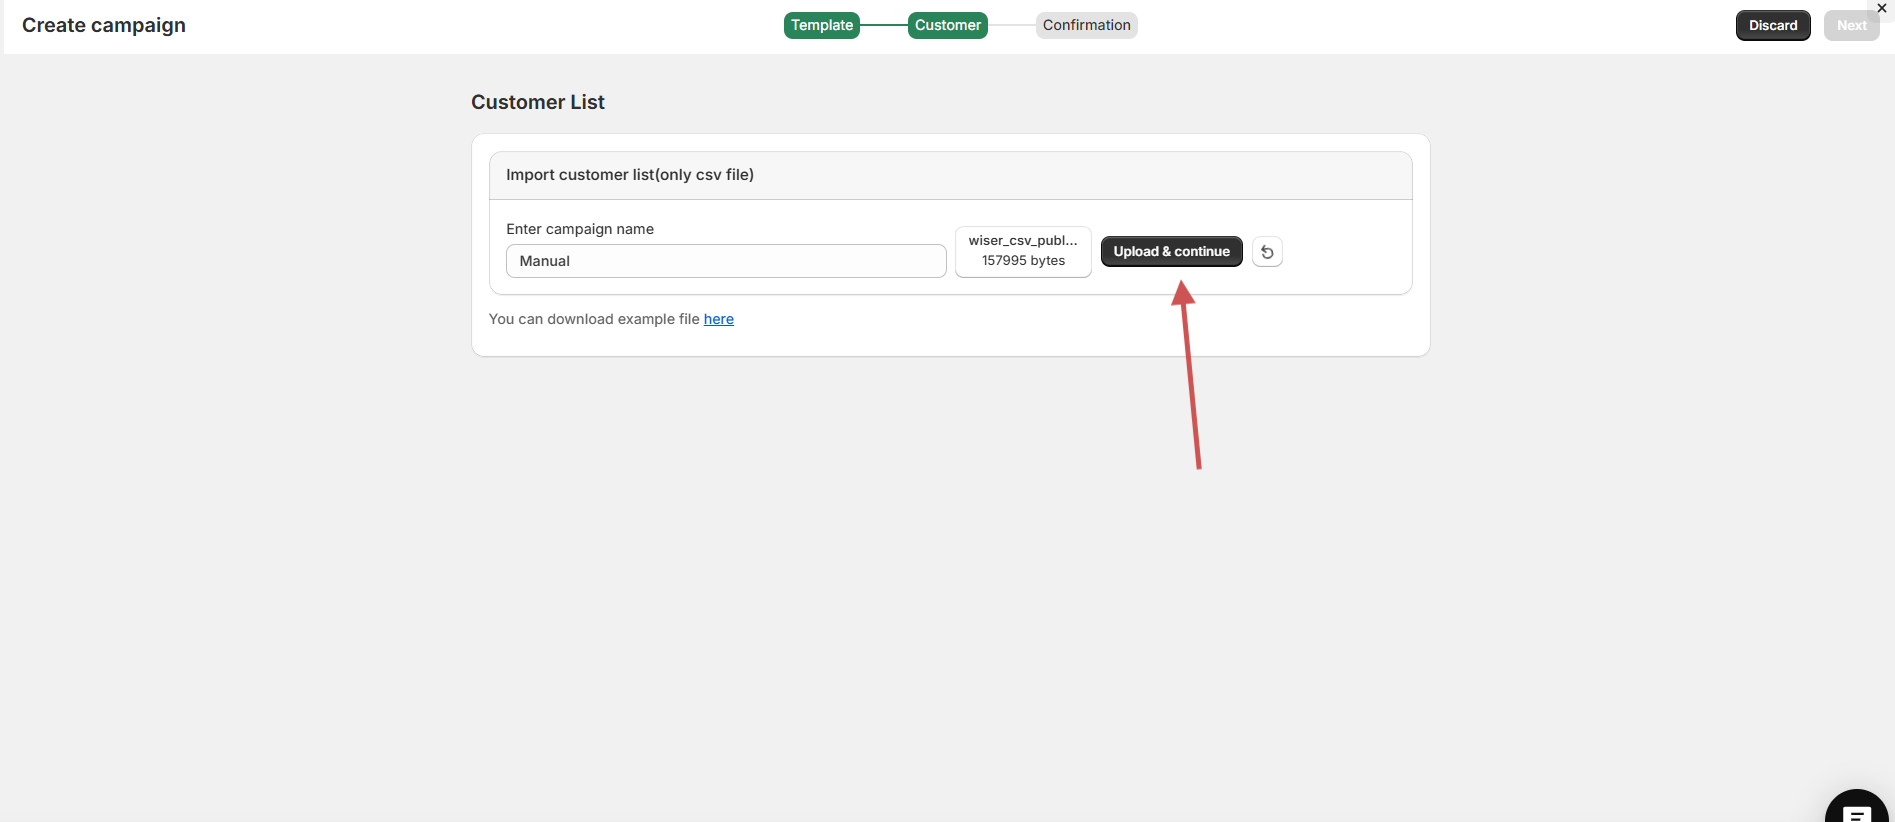
- Enter the name of your campaign.
- Click the Select file… button and choose the CSV file you prepared from your device.
- After selecting your file, click on the Upload & Continue button.
Download Example CSV File
- To ensure your CSV file is formatted correctly, download the example file provided.
- Click on the link here next to “You can download the example file.”
Step 5: Map CSV Columns to Review Fields
After uploading, you’ll be prompted to map each CSV column to WiserReview fields like:
For Ecommerce
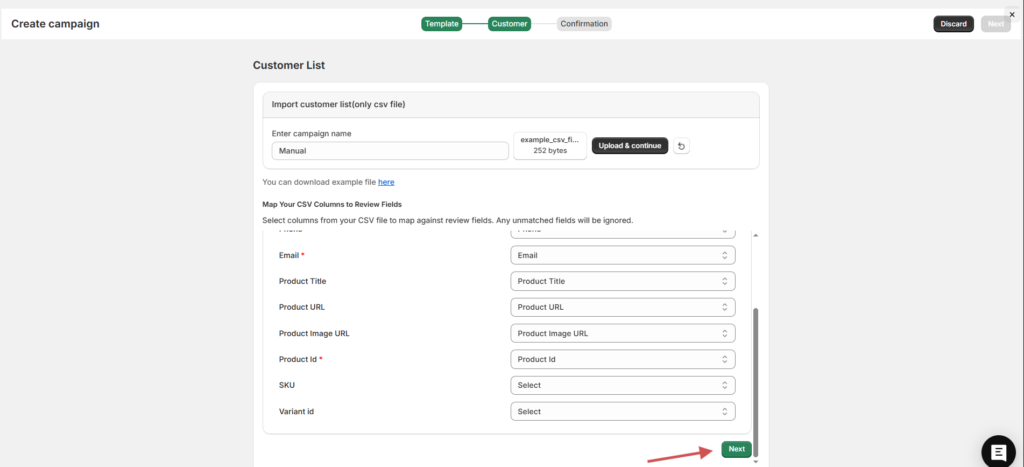
- Email (Required)
- Product Title
- Product ID (Required)
- Product URL / Image
- SKU / Variant (optional)
For service
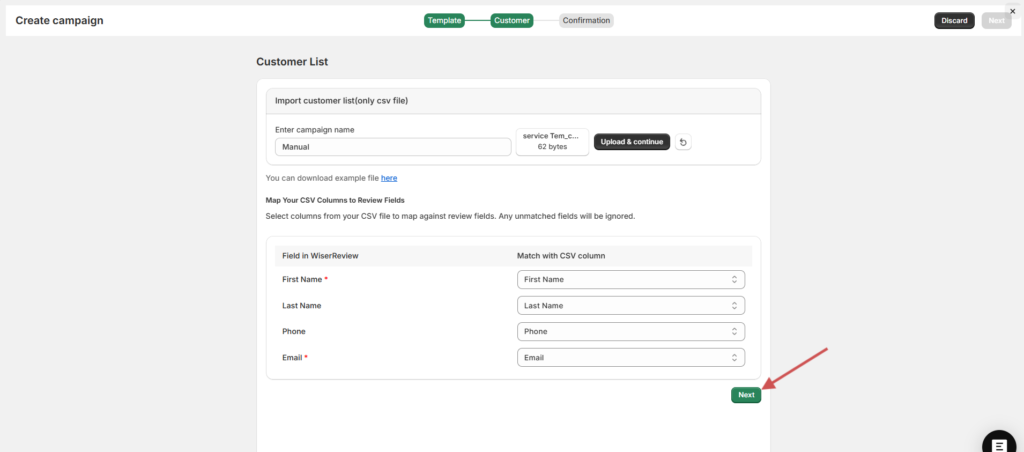
- First Name(Required)
- Last Name
- Phone
- Email(Required)
Unmatched columns will be ignored.
Once all fields are mapped, click the Next button in the bottom-right corner to proceed with uploading the CSV file.
Step 6: Launch Campaign
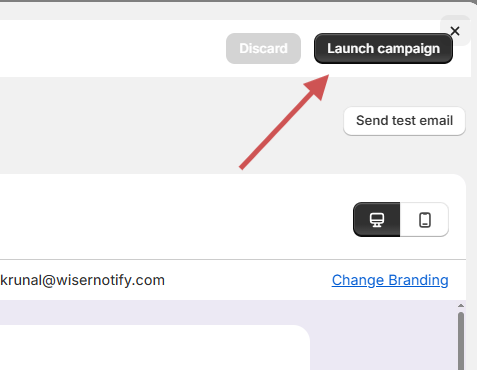
Click on “Launch campaign.”
Launching the campaign in WiserReview will start sending review-request emails to customers in your uploaded CSV list.