WiserReview integrates with Zapier to help you automate review collection and workflow automation between your favorite apps, without writing a single line of code.
Currently, WiserReview supports two main actions in Zapier:
- Create Automation in WiserReview
- Create Review in WiserReview
1. Create Automation in WiserReview
You can automatically create automations in WiserReview whenever new data is received from other apps (like Google Sheets, Webhooks, CRMs, etc.).
Step-by-Step Setup
Step 1: Create a Zap
- Go to your Zapier dashboard and click Create Zap.
- Select the Trigger App (e.g., Google Sheets, Webhooks, Airtable, etc.).
- Choose a trigger event, such as “New Row,” “New Record,” or “New Data Received.”
Step 2: Add Action
-
Click Add Action in your Zap.
-
Search for “WiserReview by WiserNotify” and select it.
Step 3: Choose Action Event
-
Choose “Create Automation” as the action event.
Step 4: Connect Your WiserReview Account
-
If you haven’t connected before, you’ll be prompted to connect your WiserReview account.
-
You’ll need to provide your Zapier Integration Key, which can be found in your WiserReview dashboard.
Refer to the Help Doc: How to Create a Zapier Integration in WiserReview for setup instructions.
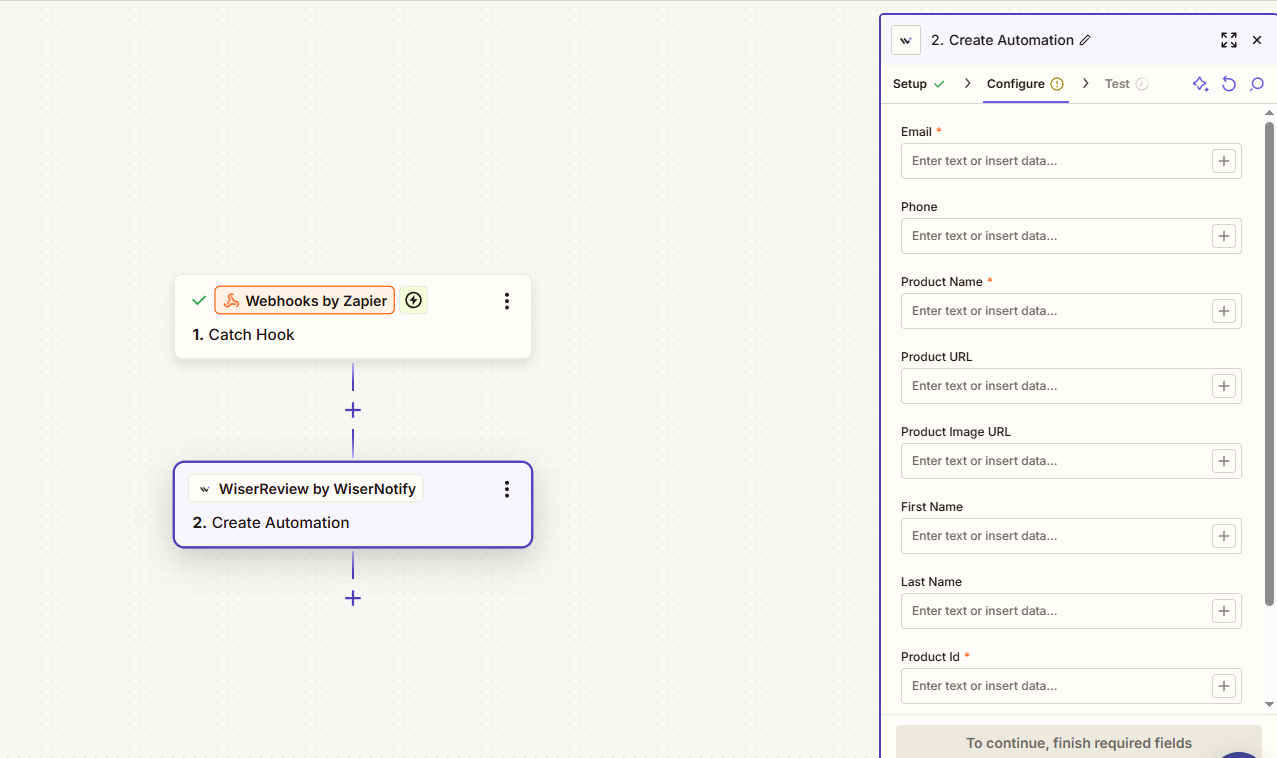
Step 5: Map the Required Fields
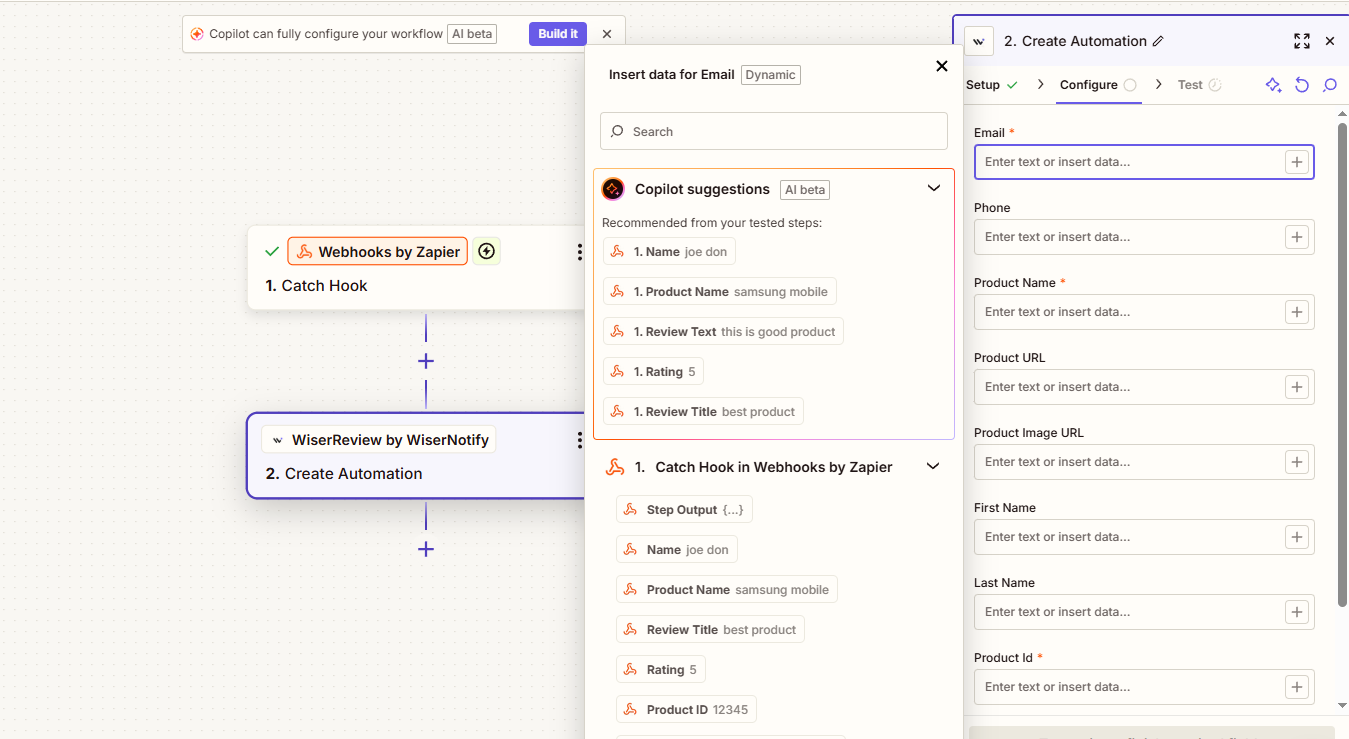
You’ll be asked to map the following required fields:
-
Email – Customer’s or contact’s email address.
-
Product Name – The product associated with the automation.
-
Product ID – The unique product ID from your system.
-
Integration – Select the Zapier integration you created in WiserReview.
Step 6: Test & Publish
-
Click Test Action to verify the setup.
-
Once successful, turn your Zap ON.
Whenever the trigger runs, WiserReview will automatically add this data to your automation queue (under “Set Review Triggers” → Zapier Integration).
This ensures the automation flow continues based on the logic you’ve configured inside WiserReview.
2. Create a Review in WiserReview
You can automatically create or submit new reviews to WiserReview using Zapier — perfect for collecting reviews from any data source or form.
Step-by-Step Setup
Step 1: Create a Zap
-
Go to your Zapier dashboard and click Create Zap.
-
Select a Trigger App, such as Google Forms, Typeform, or Shopify.
-
Choose a trigger event (e.g., “New Form Submission,” “New Order,” “New Response,” etc.).
Step 2: Add Action
-
Click Add Action.
-
Search for “WiserReview by WiserNotify” and select it.
Step 3: Choose Action Event
-
Select “Create New Review” as the action event.
Step 4: Connect Your WiserReview Account
-
If not already connected, sign in using your WiserReview Zapier Integration Key (available in your WiserReview dashboard).
See Help Doc: How to Create a Zapier Integration in WiserReview.
Step 5: Map the Required Fields
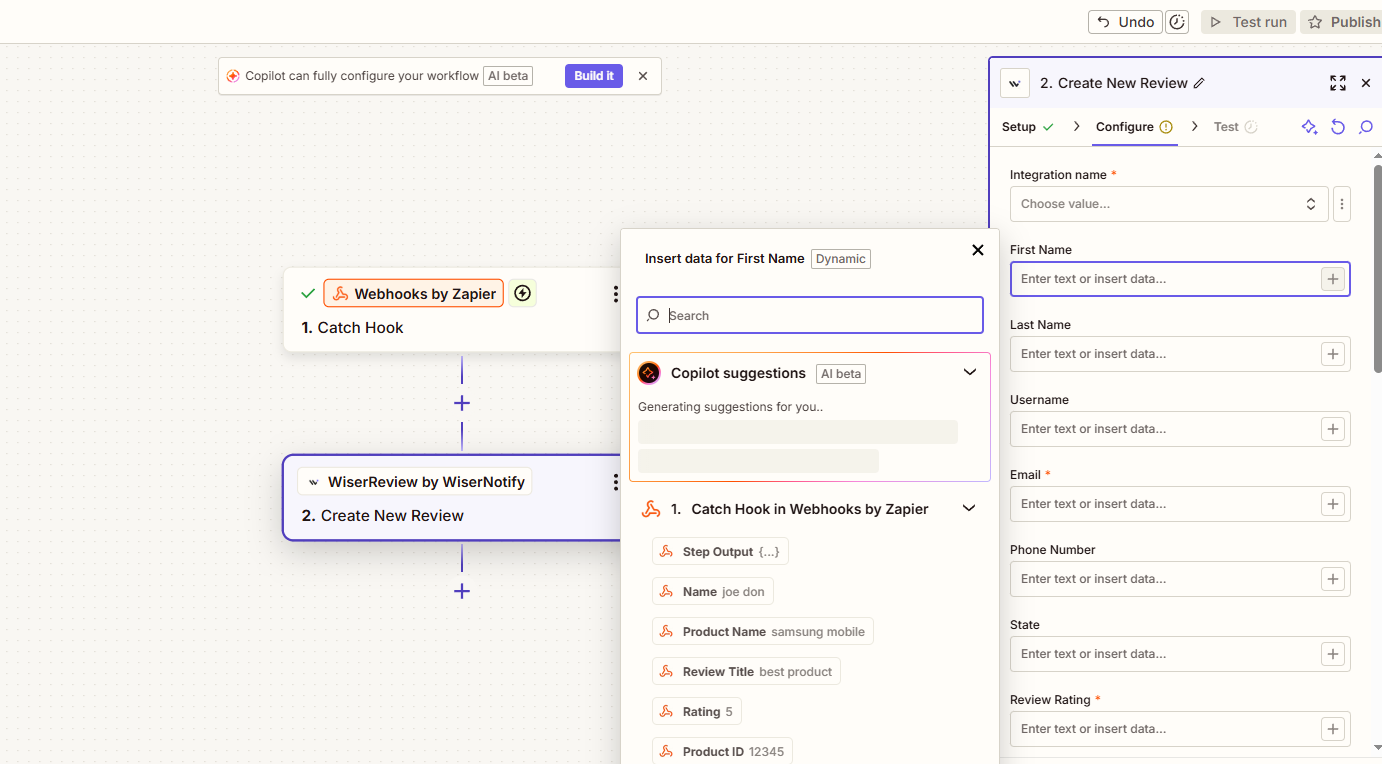
You’ll need to fill in the following:
-
Integration – Select the integration you created in WiserReview (this helps identify which Zap or data source the review came from).
-
Email – The reviewer’s email address.
-
Review Rating – The rating value (e.g., 4 or 5).
-
(Optional) Review Title, Review Message, Product Name, Product ID, etc.
Step 6: Test & Publish
-
Test your Zap with sample data.
-
Once tested successfully, turn the Zap ON.