Overview
The Grouping section in WiserNotify allows you to share reviews across similar products by grouping them together.
Accessing the Grouping Section :
- Navigate to the Grouping tab at the top of the Manage Reviews section.
Step 1. Creating a New Group :
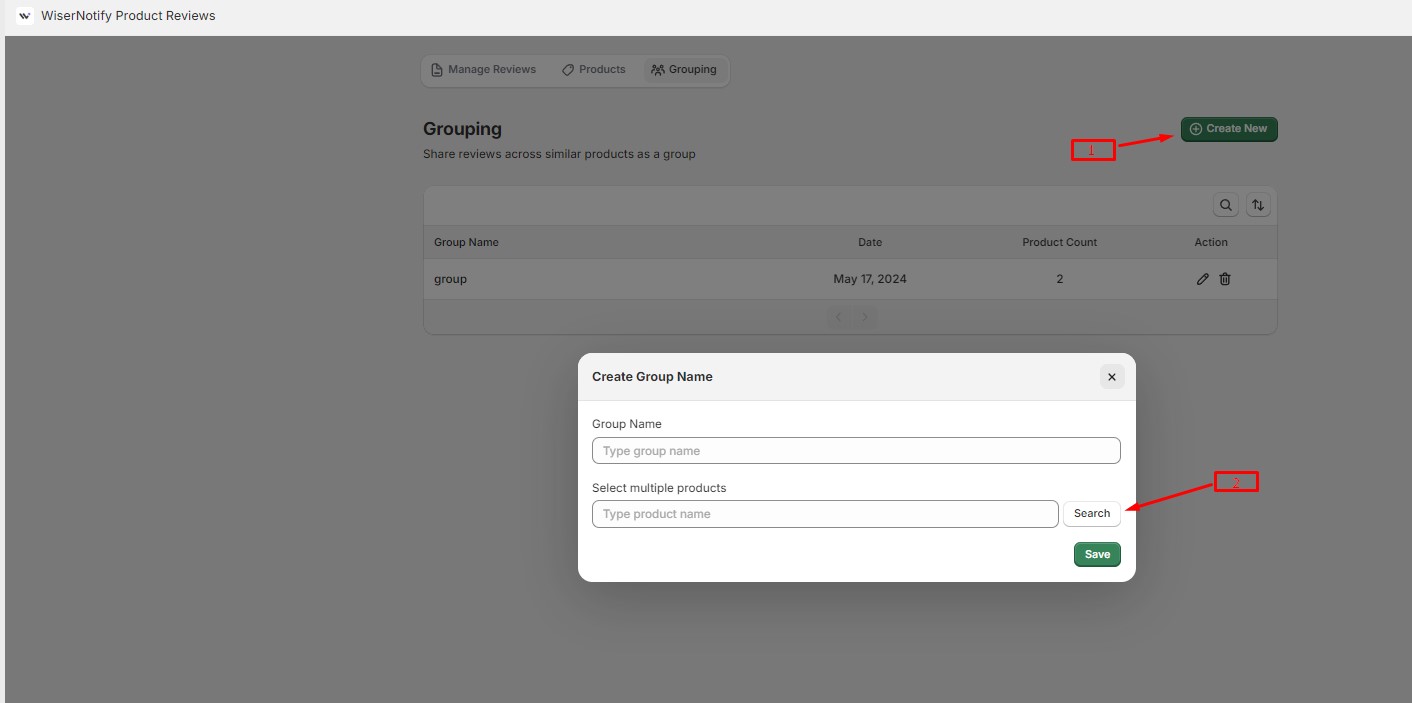
- Click on the Create New button (marked as 1 in the image) to start creating a new group.
Creating a Group Name :
- Group Name : Enter the desired group name in the Group Name field.
Step 2. Adding Products to the Group :
- Select Multiple Products: In the Select multiple products field, start typing the name of the products you want to add to the group.
- Use the Search button (marked as 2 in the image) to find and select products.
Saving the Group :
- Once you have entered the group name and selected the products, click on the Save button to create the group.
Step 3. Searching for a Group :
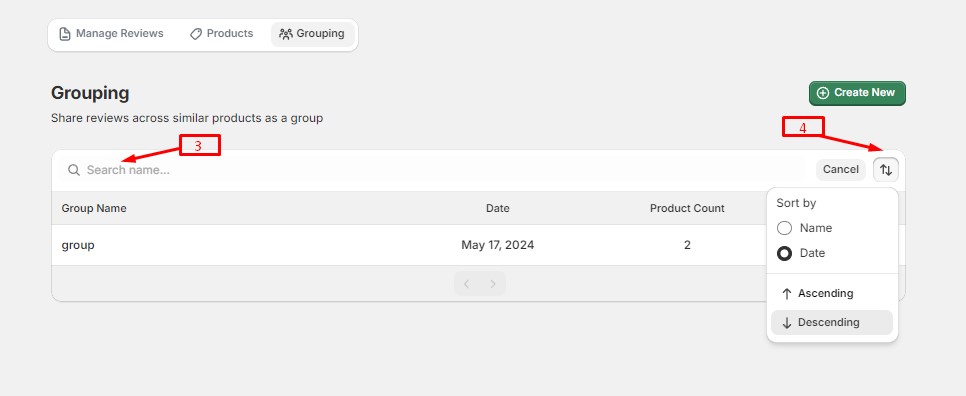
- Use the Search bar (marked as 3 in the image) to find a specific group by name. Type the group name in the search bar to quickly locate it.
Step 4. Sorting Groups :
- Click on the Sort by dropdown menu (marked as 4 in the image) to sort groups based on different criteria :
- Name : Alphabetically by group name.
- Date : By the date the group was created (ascending or descending).
Step 5. Update Groups :
- Click on the Edit icon in the Action column (marked as 5 in the image) to update the group details.
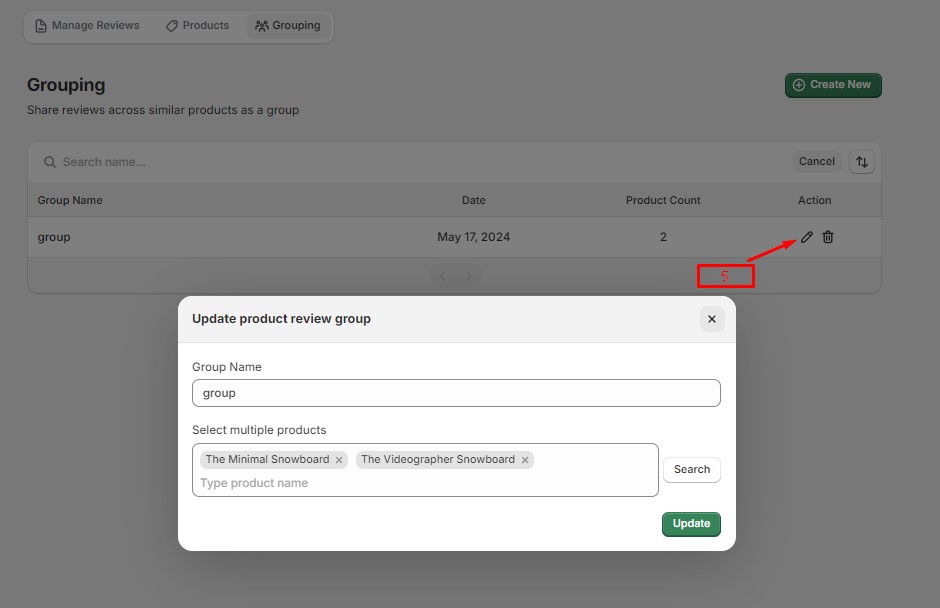
- Modify the group name if necessary.
- Add or remove products by typing the product names and selecting them from the list.
- Click on the Update button to save changes.
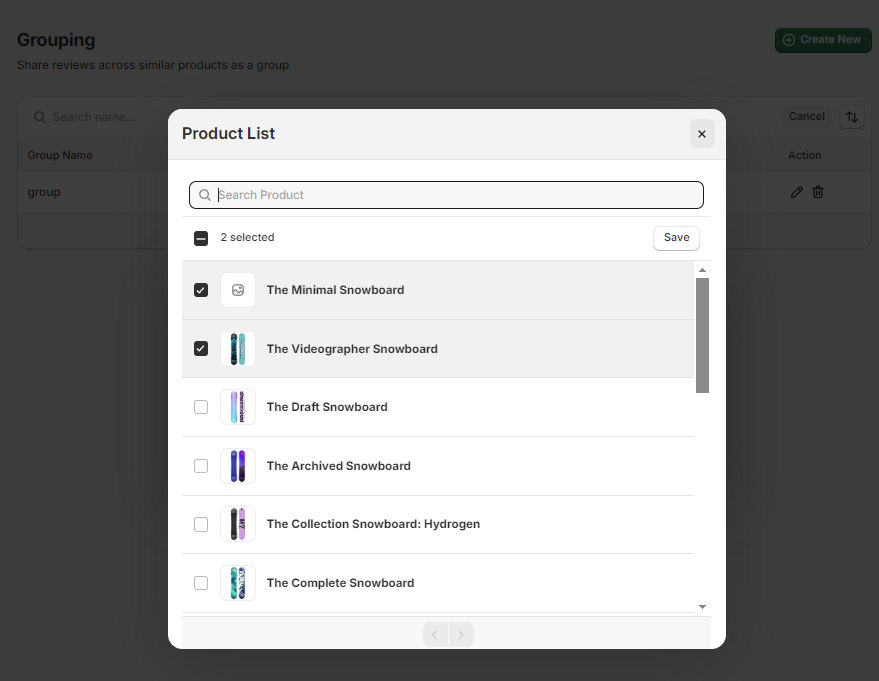
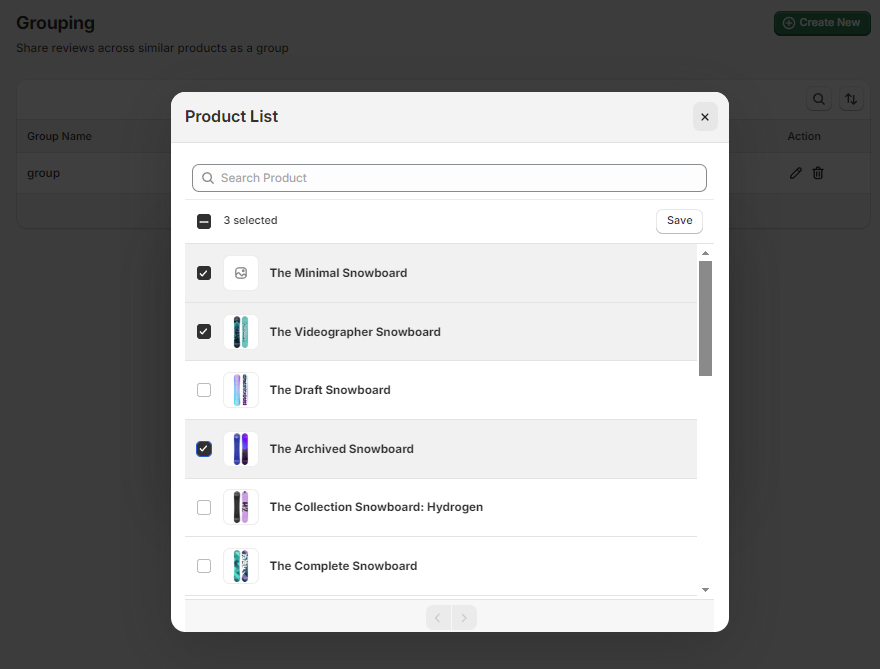
- Click on the Search button to open the Product List (as shown in the second image).
- Use the search bar to find products.
- Select the products you want to add to the group by checking the boxes next to their names.
- Click on the Save button to add the selected products to the group.
Step 6. Remove Groups :
- Click on the Delete icon in the Action column (marked as 6 in the image) to delete a group.
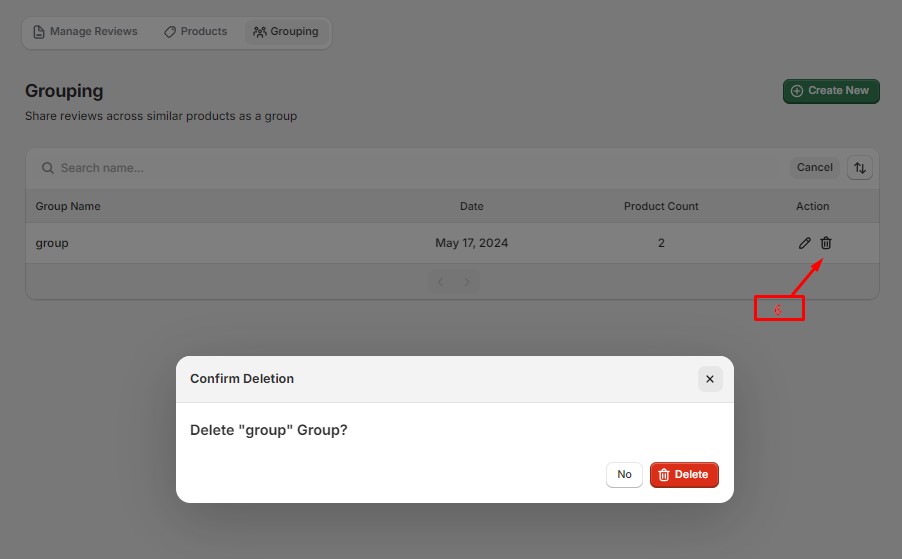
- A confirmation dialog will appear asking you to confirm the deletion of the group.
- Click on the Delete button to permanently remove the group, or click No to cancel the deletion.
Viewing and Managing Groups :
The groups are listed with the following details:
- Group Name : The name of the group.
- Date : The date the group was created.
- Product Count : The number of products in the group.
- Action : Options to edit or delete the group.